 |
| Here's the 'before' shot. Classy, isn't it? |
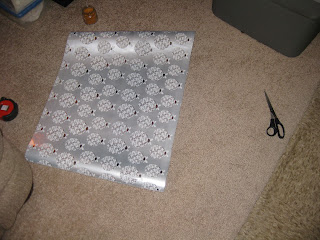
But, I still have this eyesore in the kitchen. What could I do to cover it, that is not permanant. I thought of paint, but it's not mine, and it's dirty. so the paint probably wouldn't stick. So, I came up with a brilliant (if I do say so myself) idea to cover it in wrapping paper and use magnets to hold it in place. I bought some wrapping paper from Target for $1.50. It's technically Christmas paper, but I am okay with that. Especially for such a good deal! I measure the doors, and it turned out I didn't even have to cut notches for the handles. That was a small relief. I did have an issue with the bottom door being longer, and having to make sure that I matched patterns. I also had to be sure that the pattern on both doors went the same way. But, even still the whole thing only took me around twenty minutes. Not bad!
 |
| Here's a close up of the wrapping paper I chose. My intent in choosing the silver was to make it look almost like a stainless steel fridge. I love the little modern print ornaments on this! |
Drawing a straight line on the wrapping paper would have been better with a ruler, but I was lazy and used a tape measure. Oh well, you live an learn. Now I have some slightly crooked edges, but it doesn't show overall. I was going to tape the two bottom pieces together, but in the end I just used magnets on both separate pieces and left it at that.
 |
| Remember my little square of carpet workspace? I will clear these boxes out soon, and I will be enjoying more floor space then! |
To make magnets I bought a pack of 18 little round button magnets from Wal Mart. I think they cost about two dollars for the pack. They have stick backs, which made decorating them a breeze! I pulled out my scrapbook paper and made some cute little pinwheel magnets. Some are decorated with stickers, and some are not. Some of the papers are cut with a decorative edge, and some are not. But overall I'm pleased with the way they turned out. I also had some embellishment sticker that were the exact same size as the button magnets, so I used a couple of them as well.
 |
| Here's the magnets I made. Didn't they turn out cute? And so easy! All you do is take a strip of paper, accordian fold it, pull it into a circle, and stick down on the stick side of the magnet. |
The whole project cost me around four dollars, and I find the finished product to be a welcome change to what it used to look like. I may decide to scrub it down at some point, or change out the paper, but for now I think it looks great, and it's a definate improvement!
 |
| Here is the finished product. Turned out pretty cute, I think. Now I just need to cover those hideous brown handles. Why was that ever a style? |
No comments:
Post a Comment